This was a Test Photoshoot to see where I was with my project and see if I wanted to carry on with my initial idea of Urban graffiti shoots. Below I have photos from the test shoot and a Mind map showing all my personal thoughts and tasks. 


This was a Test Photoshoot to see where I was with my project and see if I wanted to carry on with my initial idea of Urban graffiti shoots. Below I have photos from the test shoot and a Mind map showing all my personal thoughts and tasks.

Recently I’ve been scouting some locations and one of them has been Abby Mills Area in Colliers wood. The amount of nature, industrial buildings, props and furniture I found to include in my shoot represents the environment we are in right now. My model represents the youth of London and these examples below are the best shots I have taken from a test shoot, the woods gave me the idea that we as the youth should look after our nature and environment more often. The smoke coming out of the bonfire represents the annoying and toxic people who destroy the environment with vandalism, criminal damage and disturbance. By having my subjects hand over his mouth it shows that one person cannot fix our environment by his self, his words does not count at all. The gaze in his eyes is almost a cry for help!
The photograph of my model on the couch was a simple over head shot to show his calm and relaxing mood. the colours in this shot really work together, they are almost all cold colours which represents the weather we have now, it gets colder and colder each day. By him not looking at the camera is shows that the younger generations are not focused on their lives, studies and behaviour, they tend to be lazy most of the time.
The last photo doesn’t have a lot of meaning or symbolism behind it however it’s a clean and clear shot of my subject gazing into the distance. With aperture I made the focal point really explicit as the background is blured, this gives depth to the photograph and leaves the viewer to see what environment we are surrounded by.


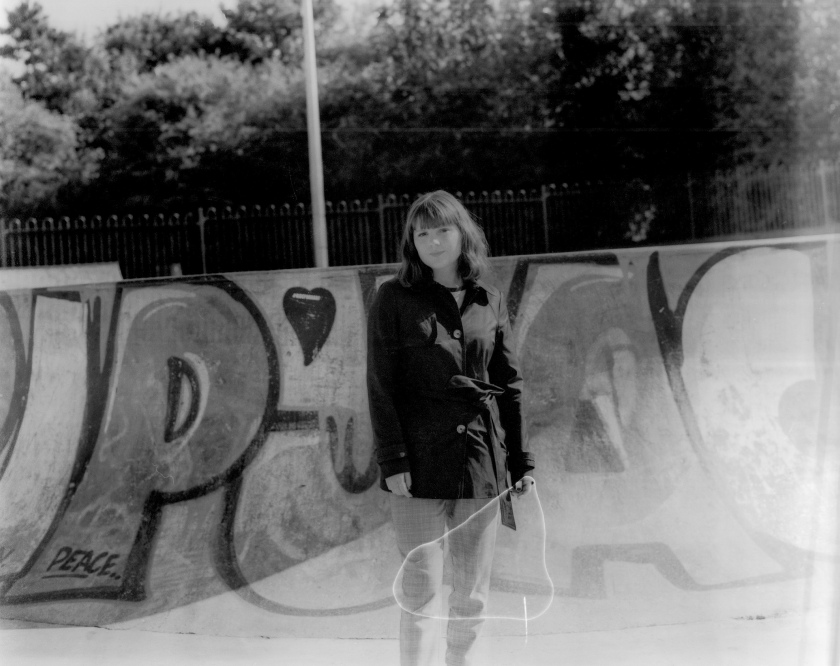
Using the 6×6 medium format camera and using the Large format camera for the first time was really challenging but on the other hand so interesting as I was performing one of the oldest way of capturing a photograph. The first photograph was taken in a Skate park by Campus, beautiful weather, urban backdrop, one model, black and white and medium format camera – nothing could have went wrong here! This was an environmental portrait as we have a little scenery in the background of a skatepark, this represents the youth, freedom and art because of the graffiti. When using the camera it was difficult for me to remember all the steps you have to do before taking a shot like metering the light with a light metre, taking out the dark slide focusing the lens and finally SNAP.
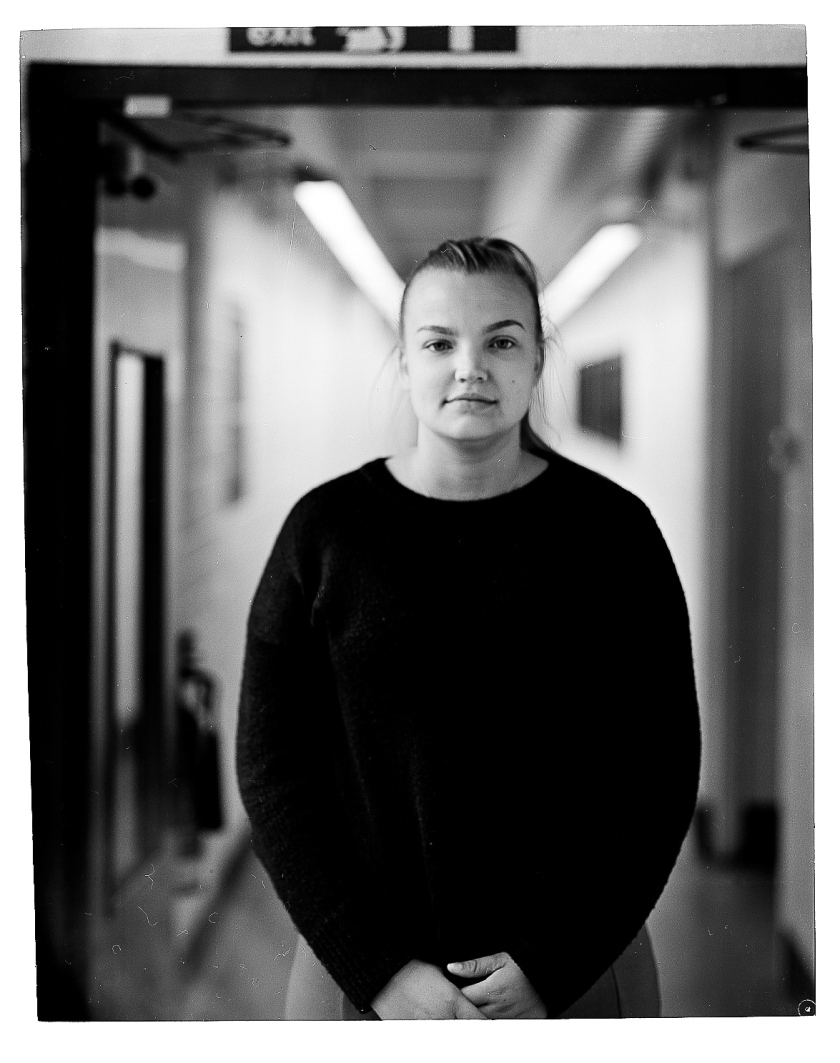
The second photograph illustrates a shot from the Large format camera. the process of taking a photograph was almost the same as the medium format however there was a little more instructions such as using a zoom in loop to measure the focus, closing the shutter each shop, remembering to take out the film carefully and changing it each time there was a photo taken and pressing a wired button which tells the camera to take a snap.
Using the darkroom was such an outstanding experience however working in complete darkness was really difficult as it was my first time. Printing the photographs was a really relaxing and took a long period of time because of all the steps you have to do. I had to gather my film in negatives carriers to keep them dust free and fingerprint free. Then using inserts you select which negative you want to print, each insert is used for different formats and sizes like for instance a 6×6 Square. you gather yourself a measuring board which later the photo will be projected on, get a focus lens, quality paper and cardboard for exposure.
When entering the darkroom you have to choose whether you’re using the black and white or the colour room as the black and white involves working with a dark red light and the colour room is pitch black. When you loaded the insert in the exposure machine you are good to start. First you have to focus the photo so that it prints out in great quality. Secondly by having a mod device by your side you can control the grading and exposure lengths which make the actual machine expose light onto the paper. When that is done you can transfer the image onto the developing tray with special chemicals. For a minute and a half the photo is soaking in the tray which seconds later you can see the photograph exposing on the paper. Then for thirty seconds you end the developing in a second tray which involves a different chemical. Thirdly you take it out and put it in the last tray which processes the photograph so that there is final details exposed and the contrast settles in slowly. The last steps are the quickest, you soak the print in water for about 10 minutes and dry it in a machine so there are no watermarks. You finish off with scanning the print onto a computer to further develop with editing softwares.
Yesterday I visited Wimbledon, there I carried out this photo shoot with two models that helped me understand further my project’s idea. I reached a rooftop to gaze into the landscapes of london and industrial buildings.


Recently I’ve been lucky enough to experience going to perform a photo shoot on the Ski Slope in Norway. Gathering a model and time of day was crucial as without them the photoshoot would have come out unsuccessful. I’m proud to say that the colours of the outfits the model was wearing was considered with the cold colours of the backdrop. The snowy, hills and bare trees contrast with the really warm, navy jacket. I considered that any background during this photoshoot had to link with the subject, it had to tell you a story about them. Using numerous compositions, I learnt a photo could be really different by the way the models chin is facing or the way they are standing or kneeling could reflect on domination of the photo( Who is in control, the photographer or the model?).
While changing into the black jacket, I wanted to show off the warm, furry hood which was zipped out so it could have been exposed. My placing my subject sideways, it enabled the photo viewer to see the details of the jacket and the facial expression of the model.
Lastly the photograph of the subject with one leg up was connecting with the Tippi in the background, because it is so cold outside, when you go inside the Tippi you suddenly get warmer and therefore I wanted my model to slowly take of his jacket to show the change in the temperature and also expose the details of the jacket.


