Mind Map plan for Environmental Photoshoot – Unit 1

Environment, Research

IMG_4226 copy

Through creating this mind map I have effeicently gathered my ideas in order to produce a photo-shoot that will sucessfully communicate the theme Enviroment and subcultures. I listed locations, equipment, plans for outfits, camera settings, the software that will allow me to edit the photograph for professional look, health & Safety cautions to have a safe environment and workplace and more to ensure I have explored all elements of my photoshoot and have planned ahead to acheieve my target.

Test shoots

Environment, Test Shoots, Visual Practice

Yesterday I visited Wimbledon, there I carried out this photo shoot with two models that helped me understand further my project’s idea. I reached a rooftop to gaze into the landscapes of london and industrial buildings.


Environmental Background Shoot

Environment, Research, Test Shoots, Visual Practice

Norway, Oslo

Photo shoot

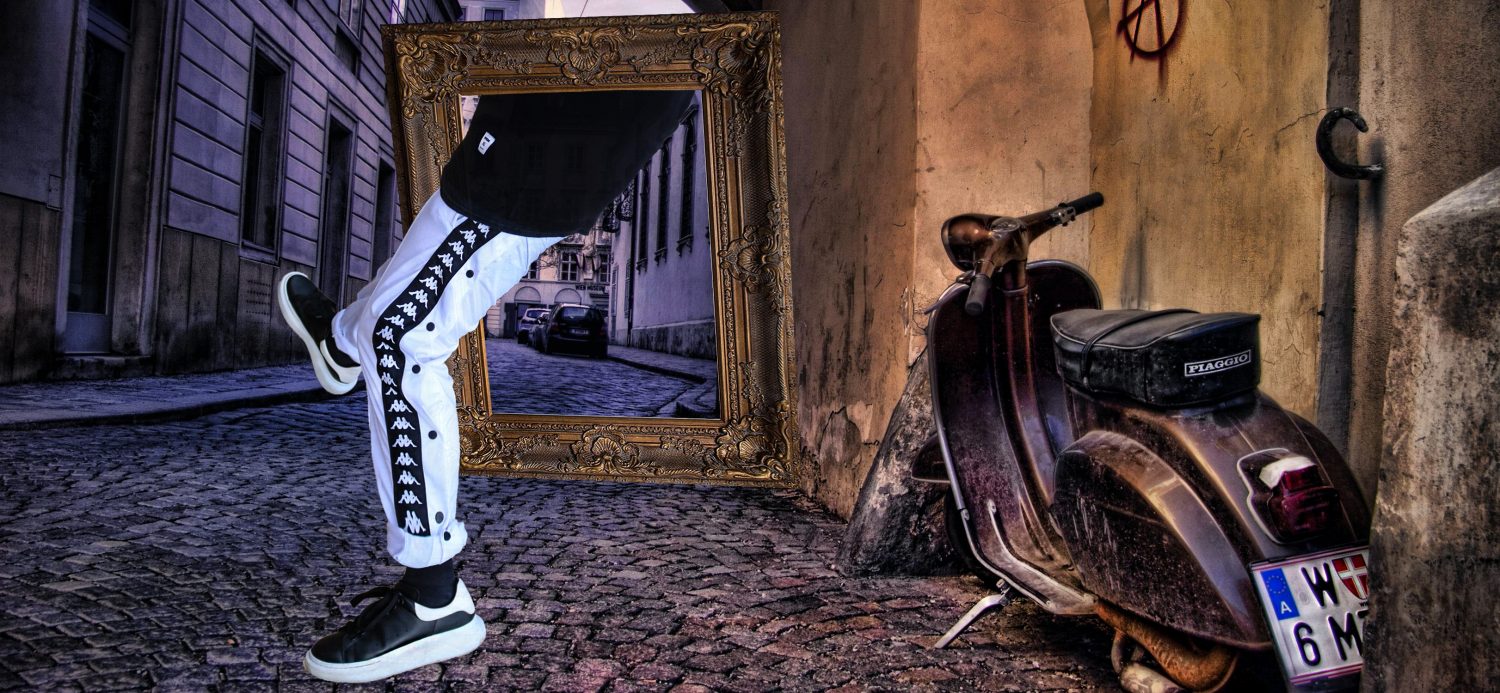
Recently I’ve been lucky enough to experience going to perform a photo shoot on the Ski Slope in Norway. Gathering a model and time of day was crucial as without them the photoshoot would have come out unsuccessful. I’m proud to say that the colours of the outfits the model was wearing was considered with the cold colours of the backdrop. The snowy, hills and bare trees contrast with the really warm, navy jacket. I considered that any background during this photoshoot had to link with the subject, it had to tell you a story about them. Using numerous compositions, I learnt a photo could be really different by the way the models chin is facing or the way they are standing or kneeling could reflect on domination of the photo( Who is in control, the photographer or the model?).

While changing into the black jacket, I wanted to show off the warm, furry hood which was zipped out so it could have been exposed. My placing my subject sideways, it enabled the photo viewer to see the details of the jacket and the facial expression of the model.

Lastly the photograph of the subject with one leg up was connecting with the Tippi in the background, because it is so cold outside, when you go inside the Tippi you suddenly get warmer and therefore I wanted my model to slowly take of his jacket to show the change in the temperature and also expose the details of the jacket.


~DSLR Induction/ Studio Workshop

Test Shoots
  • Welcome to my first post on my this blog. Here I will illustrate numerous shots from the workshop I have experienced with our studio expert Nina. Going from up to bottom, the first photograph really pointed out to me about the use of space and aperture. the perfect composition allowed me to make my subject the focal point and having the background as really old-fashioned/industrial lamps fulfilled the overall texture of the environment my subject is in. Furthermore, I planned to include a snooker rod in my shot to give a little back story of my model, I wanted to enhance his personality by connecting the industrial lamps and the pool rod to make this shot an environmental portrait.
  • The second and third photograph has been taken within the campus on the staircase because of the fantastic window light I could capture in my shots. Using only a depth of field of f.stop 8 I could have my subject really in focus while the background got blurred. on the second shot I had a friend holding a light reflector onto my models face in order to make his face more brighter adding more detail and texture to his skin tone. The third photograph was a classic, using a brick wall background created an edgy/urban look and the window had a perfect beam of light shinning across my models face which created this amazing effect of spot lighting.
  • Fourth and fifth photo is a side profile, with and without a tint of a glaze into the lens by my subject. This created an intense stare with the audience; sometimes when a subject looks directly at the camera it can create discomfort. On the other hand not looking at the lens created either tension or intrigue. I could have either shown my audience the object or landscape my model is looking at or hide it. I created a mysterious shot as it gets my audience to question their imagination.
  • The 6th, 7th and last photograph(11th) were taken on the balcony of our campus. This enabled me to experiment with the view and of course the natural lighting and perspectives. I had my camera set on f.stop 10 and an ISO setting of 250.
  •  Lastly photographs 10 was planned to create the hiding of identity. It was captured by using water Vape smoke which had mostly layered the top half of his face. After by using Adobe Lightroom I edited the photograph by changing the smoke colour to green by changing the HUE to make it far more interesting and also using small adjustments I reformed the contrast, exposure and vibrance I made my outcome look more professional than its original form.